Brain holograms with Blender and Looking Glass
Getting a cranial MRI has been on my bucket list since I was a young kid — probably inspired by watching PBS science specials. This summer, out of necessity, my opportunity came knocking.
Looking Glass is a novel display technology capable of glasses-free 3D images. It works by using fancy optics to display a different image depending on the angle it’s viewed at. Similar to the 3D dinosaurs and skulls which adorned stickers and trapper keepers in my childhood.
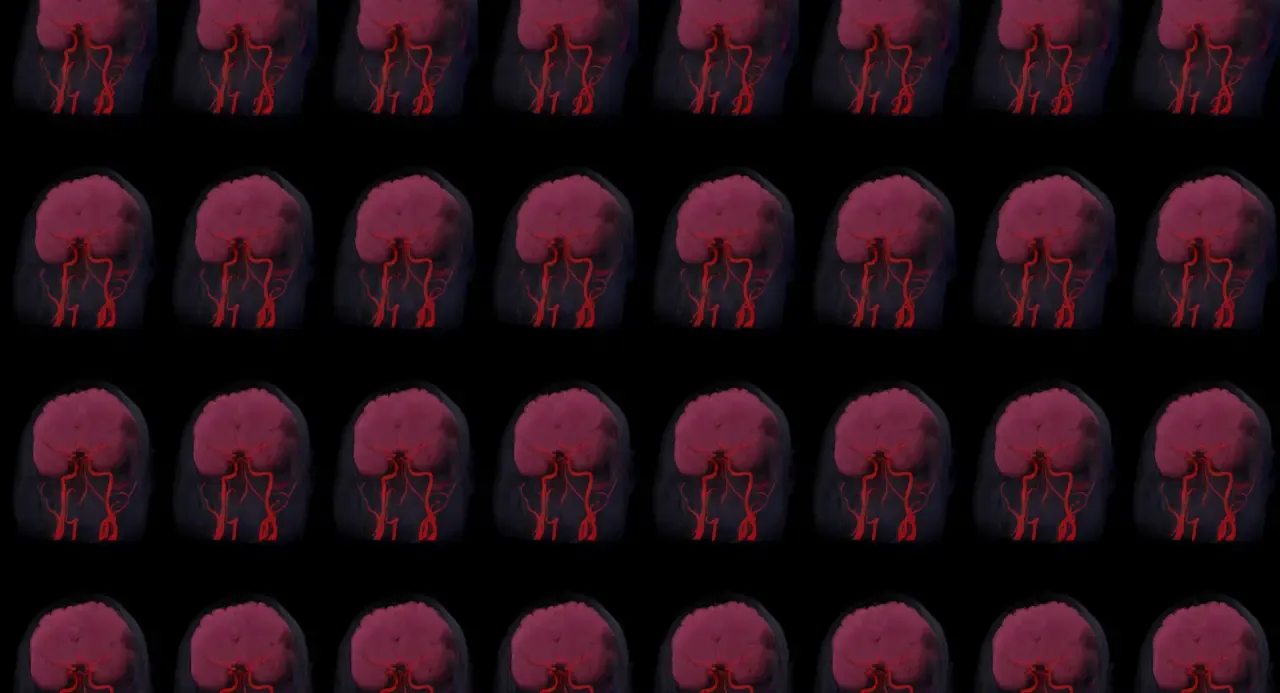
The Looking Glass presented an opportunity to experience something utterly sci-fi to my child self: the possibility to look inside my own brain in 3D. When I received my scans, I knew what I had to do. The video above is a Looking Glass Portrait displaying a rendering of my head, arterial blood vessels, and brain.
Another thing I was really into as a kid was Blender. I discovered it when I was 11 years old, trawling the web for a 3D modeling program I could learn. I played with Blender for hours a day during the the early 2000s, and even emailed Ton Roosendaal once. He replied! But that’s a story for another day.
Around 20 years later, these worlds have collided again. Blender is respectively space age compared to my childhood tool, capable of raytracing volumes using photorealistic physically based rendering techniques. Pretty much the only thing that hasn’t changed much is Blender’s logo. Still slaps.
I couldn’t find an up-to-date tutorial for Blender 3.2 using OpenVDB volumes, so here’s a quick guide of the best approach I could find.
Background
Personally, I’m not trying to achieve anything medically useful here; I just want something cool to look at to remind myself I’m made out of meat.
My MRIs arrived as zips of DICOM files containing various sequences of image slices with different parameters. These image sequences can be turned into 3D surfaces using fancy algorithms or rendered as voxel volumes. It’s the raw voxel data that’s of interest to me here, with the value of each voxel relating to the kind of the material at each position in space.
Unfortunately it’s not currently possible to import DICOM into Blender directly, or even convert DICOM directly into the industry-standard OpenVDB format. We have to do it in two hops, via a world tour of open source scientific imaging software.
Step 1: Slicer -> VTK
First, I loaded my DICOM data into 3D Slicer 5.0.3. Slicer actually has its own Looking Glass integration, but at the time of writing it has a bug preventing rendering at the Looking Glass Portrait’s aspect ratio.
Slicer has some amazing volumetric rendering and slicing abilities hidden by an inscrutable (at least to this layperson) UI. Once a DICOM volume is loaded into Slicer, it’s possible to export the data in VTK, a scientific visualization format. We’ll turn this into OpenVDB in the following step.
Aside: Slicer has an amazingly-named extension called HD Brain Extraction which uses PyTorch to segment the brain out of a full head MRI scan. I used this to export a separate brain-only volume to color distinctly in my renders. Like all good research-grade software, it blocks the Slicer UI thread while it downloads a gigabyte of Python ML files.
Step 2: ParaView -> OpenVDB
I used a prerelease of ParaView 5.10.2 due to graphics driver bugs, but stable should work too. ParaView can import the VTK file and render its own volume visualization. Of note here is the histogram view, which can be used to find the minimum and maximum voxel values, which we’ll use when shading the volume in Blender.
Once the VTK is loaded into ParaView, it can be exported as an OpenVDB file. There’s no need to include the color or alpha dimensions in the export; they’re derivatives of the density values.
Step 3: Shading and rendering in Blender
In Blender, create a volume and import the OpenVDB file (you can also drag and drop the .vdb file directly into Blender). For me, this created a humongous volume which needed to be scaled down to fit a normal viewport. I actually had multiple volumes to import (including an MRA with contrast!), so if you have multiple volumes in the same coordinate space, be sure to scale them all together.
Next, a “Principled Volume” material can be applied to the volumes. Now the fun begins: interpreting the density data artistically using Blender’s shader nodes system.
After a bunch of trial and error, I ended up using the following basic pattern for shader nodes:
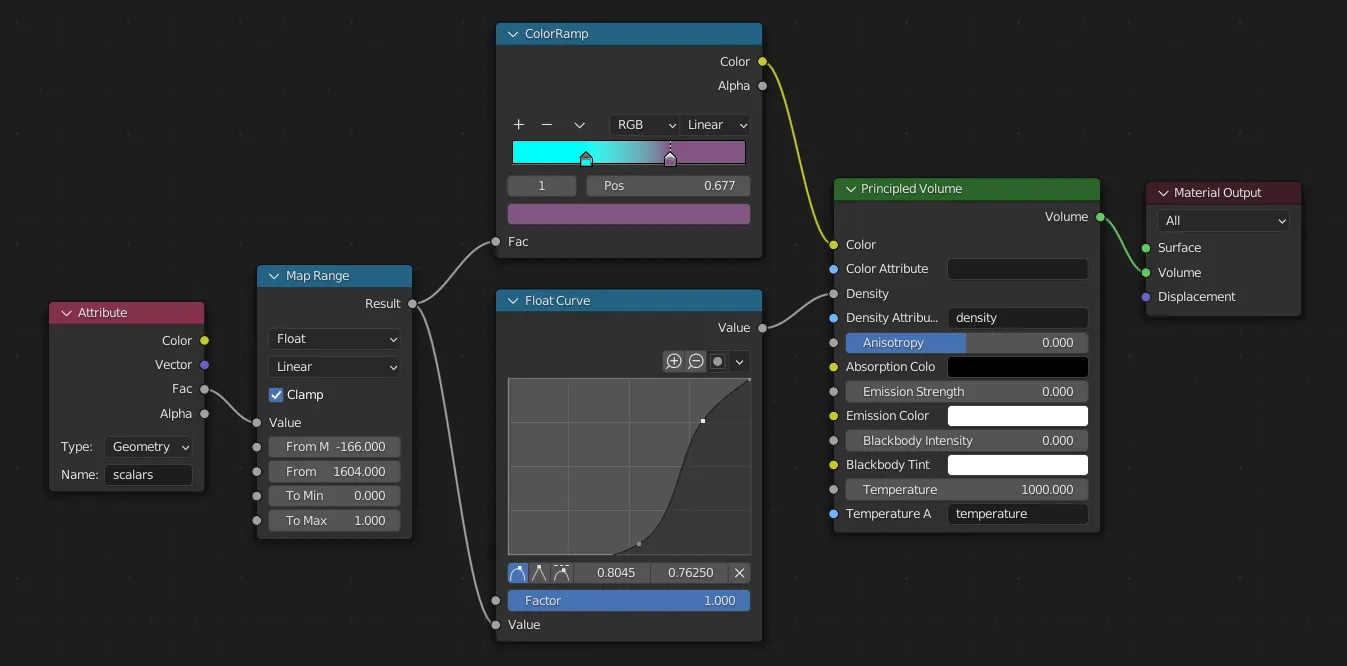
The “Map Range” node here is scaling the range of density values from [0-1]. I got the min and max values here from the histogram in ParaView. then we map this value to a color ramp and a curve for the “density” param of the volume, which controls how many particles are rendered in each voxel (think of it like thickness of smoke).
This is only a starting point, though. You can play with nonlinear color ramps, density curves with holes, and plugging into different volume parameters. Hint: Principled Volume shaders are also used to render fire! I’ve been experimenting with fancier shader setups which zero the density above a threshold Z value, enabling animations of volumes being sliced through.
Here’s a screencap of the full workflow in Blender.
Rendering a hologram
Looking Glass provides a Blender Addon which renders quilts. Quilts are image mosaics of each distinct viewpoint shown by the display. You can even render quilt animations and view them in 3D on the device! Having both spatial and time data to play with really opens up a mind-boggling range of effects. It can also take a mind-boggling amount of time to render, since each quilt consists of ~50-100 smaller individual renders. I’m 5233 CPU-hours into raytracing my first 250 frame animation, and still less than halfway done. 😂
Looking towards a 3D future
I hope you’ve enjoyed geeking out with these tools as much as I have. Beyond rendering medical data, some of the coolest things I’ve seen on the Looking Glass are shared on its nascent blocks.glass gallery. Several of my favorites experiment with fog and volumetric light, producing effects I’ve personally never seen on any kind of display before.
If you have any questions, feedback, or cool images of your own to share, I’d love to see them! Please drop me a line at holobrains@chromakode.com.